
Glass-Door Shaker Cupboard – FineWoodworking
This site contains affiliate links. I may earn a small commission, at no extra cost to you.
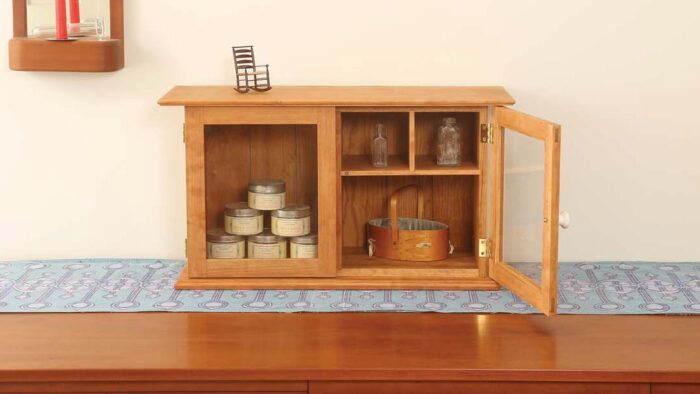
Synopsis: After seeing a photograph of a small cupboard at a Shaker group in Kentucky, Christian Becksvoort determined to breed it. The cupboard has six backboards, and so they overlie the case high and backside. 4 are grooved on either side, whereas the tip backboards are grooved on only one facet. Splines are inserted within the grooves after the backboards are nailed in place. The door frames have mortise-and-tenon joints. One door has a porcelain pull, whereas the opposite has a stopped cove as a finger pull.
A couple of years in the past, I chanced throughout a photograph of a diminutive walnut cupboard on the South Union, Ky., Shaker group. The dimensions, the glass doorways, and the inside shelf and divider intrigued me. The cupboard’s function was unclear; maybe it was used to retailer herbs, medicinals, or stitching notions. The glass doorways recommend that it was made after 1850.
With out really having seen the cupboard, I used to be hazy in regards to the development particulars. I do know a number of issues: The dovetailed case will get utilized high and backside boards glued to it after meeting. The vertical backboards bypass the case high and backside, so the tip grain is seen till the utilized high and backside boards are added. Additionally, it seems as if the underside might have been added later, as a result of it’s shorter and thicker than the highest and has dadoes or cutouts on the edges. If I have been making a strict copy, I might comply with all of these particulars, however as a venture for myself, I opted to make a number of adjustments: The 2 finish backboards sit in rabbets within the sides; I used cherry as a substitute of walnut; I made some slight changes to dimensions; and I needed to guess and use my greatest practices the place particulars weren’t seen.
Dovetails hold it collectively


All the time tails first for Becksvoort. Begin by laying out and chopping the tails on the ends of the highest and backside boards, then place the chisel within the scribed baseline and start with mild mallet blows. Reduce out a shallow chip. Repeat. The mallet blows ought to get tougher and the chips thicker. Transfer midway by means of, flip the board, and end losing materials away between the tails.
 |
 |
Switch and lower. With the pin board (the case facet) vertical within the vise, use a knife to switch the tails to it. Then use a handsaw to chop between the baseline and the half-blind line.
 |
 |
Chopping pins. As you probably did with the tails, begin with mild chisel chops on the scribed baseline. Then take away a skinny chip by paring from the entrance. The subsequent chops alongside the baseline are deeper. Comply with these by eradicating thicker chips. You’ll be able to break up the chips to take away them, as a result of they are going to be wider on the backside than the highest. Pare alongside the cheek of the pins, and refine the flat on the half-blind line.
The case: All issues not equal
The 4 case boards are flush on the entrance, however the case sides are wider than the highest and backside boards and are rabbeted alongside their again edge to obtain the again. The case high and backside finish on the rabbet, permitting the backboards to overlie them.

Dadoes earlier than gluing up. Use a desk noticed and a dado blade to chop the dadoes for the middle divider within the high and backside case boards. The middle divider is similar thickness because the case components–5⁄8 in.—in order that’s the dado’s width as effectively.
After chopping the dovetails, rabbets, and middle divider dadoes, glue and assemble the case. Then concentrate on chopping the dadoes for the shelf and the shelf divider.
 |
 |
Glue within the nooks and crannies. Unfold glue rapidly in and across the dovetails on the tail boards in addition to the pin boards. Then faucet the case collectively.

Tighten issues up. When you faucet all of the dovetails dwelling, add cauls and clamp stress till the glue dries. Test for sq. and regulate the clamps if needed.
Inside infrastructure
Loads of dadoing have to be finished to create the inside compartments. A middle divider will get dadoed into the case high and backside, a shelf will get dadoed between the middle divider and the facet of the case, and the shelf will get a small vertical divider dadoed between it and the highest.
Dry-fit the middle divider, and mark it and the appropriate case facet for the shelf, then rout dadoes in each. Set the shelf in a single dado, then mark its size within the different dado. Reduce it to measurement and dry-fit the shelf in place. Mark the middle level on the shelf and switch the mark to the highest. Then with the shelf eliminated, rout each the case high and the shelf to simply accept the shelf divider. When all the things suits appropriately, all of the dividers and the shelf will be glued or tacked into place.

Safe the middle divider. Slide the middle divider in place, drill a pilot gap on every finish, and faucet in brads to verify the divider doesn’t transfer when you’re routing dadoes in it.
 |
 |
Two extra pairs of dadoes. To chop dadoes for the shelf, use a trim router and a double-fence jig. Reduce the dado in the appropriate facet of the middle divider, then flip the case and lower the dado on the within of the appropriate case facet. Carry out an identical operation to chop the dadoes for the shelf divider.
 |
 |
Assemble the dividers. As soon as all of the dadoes are lower, you’ll be able to set up the shelf and shelf divider. First, drill a pilot gap by means of every dado (close to the entrance of the case) to find the place the brads will go; this can stop errant brads from poking by means of in undesirable locations. Subsequent, slide the shelf and shelf divider in place, faucet in every brad, countersink it with a punch, and fill the opening with putty.
Atypical again work
The six vertical backboards are subsequent. I joined them with splines in 1/8-in.-wide grooves. The boards will should be wider when you resolve to make them tongue-and-groove or shiplapped as a substitute. The left and proper finish backboards are glued to the lips of the rabbets; the opposite items are fitted dry and tacked to the case high and backside.

Getting groovy with the backboards. The six backboards are grooved for splines on the desk noticed. The 2 finish boards are grooved solely on one facet; the remaining get grooved on either side.
 |
 |
Begin on the ends. Put all of the backboards in place dry to make certain they match, and trim the tip boards if wanted. Apply glue to the rabbets, put the 2 finish boards in place, drill pilot holes, and drive nails. Set the ultimate 4 backboards in place dry, ensuring they’re flush with the highest and backside boards.
 |
 |
Tape, nail, and insert. Tape throughout the backboards and over the edges to maintain the boards from shifting. Drill pilot holes and nail the boards in place, avoiding nailing into the spline grooves. Slide the splines into their grooves. When the highest and backside boards are added, they are going to be trapped in place. Depart a small hole between the backboards (about 1⁄16 in.) in addition to within the spline recess to permit for wooden motion.
Mortise-and-tenon door frames
After milling the door rails and stiles, rabbet all eight items to simply accept the glass panes. The through-mortise-and-tenon joints are centered to match the rabbets.
Run door rabbets. The rails and stiles get rabbets to accommodate the glass panes. You’ll be able to lower them on the desk noticed with two rip cuts per piece. The primary lower is with the within face towards the desk, and the second lower is with the surface face towards the fence.
Reduce the cheeks on the desk noticed. The rip fence is the cease for the shoulder lower. The shoulders are offset, so that you’ll want two fence settings. Should you lower the mortises with a router, drill press, or any bit that leaves spherical ends, you’ll have to sq. them up earlier than becoming the tenons.
|


Double down on the glass doorways
When you’ve glued up the door frames, you’ll be able to hinge them. I take advantage of a mixture of a trim router and chisels to get the job finished. When they’re hinged, you’ll be able to match the doorways, leaving a few 1/32-in. hole on the high, a few 1/16-in. hole on the backside, and a powerful 1/16 in. between the 2 doorways.
 |
 |
Hinge the doorways. Lay out, rout, and chisel the hinge mortises within the door stiles. As soon as you put in the hinges within the doorways, set them on the case and switch the hinge places. Then lower the hinge mortises within the case sides.
 |
 |
The proper match. With the doorways put in, finetune their match. Use a straightedge and a pencil to mark any locations the place you need to take away materials with a block airplane. As a normal rule, Becksvoort leaves “a dime match on the high and a nickel match on the backside– as a result of hinges by no means transfer up.”

Integral pull. The proper-side door has a porcelain knob, however the left facet has a aid on the within of the stile for the fingers to seize when opening. Reduce the stopped cove pull with a quarter-round bit on the router desk.
With the doorways eliminated, drill for the porcelain knob (mine is from vandykes.com) and the magnet catches, and rout a stopped cove as a finger pull on the within of the left door stile. Earlier than rehanging the doorways, set up the glass, making skinny strips for stops and utilizing tiny brads. So as to add a little bit of historic authenticity, I take advantage of outdated or restoration glass.
Prime to backside
As soon as the case is assembled, the utilized high and backside boards will be profiled. The entrance and finish edges of the highest get rounded over, with a small fillet on the underside. On the underside board, the entrance and ends get a heavier roundover, with a fillet on the highest. I wait till after I’ve hinged the doorways to the case to connect the highest and backside.
 |
 |
Two cuts per profile. The utilized high will get a roundover with a fillet on the underside. With the board face up, use a 3⁄16-in.-radius roundover bit raised to chop the fillet in addition to the curve, and profile each ends and the entrance edge. For the second lower, flip the board backside facet up and decrease the bit to chop solely the curve. Comply with the identical steps for the utilized backside board, however change to a 1⁄4-in.-radius roundover bit and lower the fillet on the highest face of the board as a substitute of the underside face.

Orient the utilized high and backside. After making use of end to the case (having masked off glue surfaces), place the highest and backside so the facet overhangs match, and pencil some marks to information realignment later.
 |
 |
Glue on the highest and backside. With the case on its again on bar clamps, skim a layer of glue on the highest and backside boards. Place the boards on the case, and use spring clamps to carry them in place when you tighten the cam clamps and bar clamps.
Earlier than gluing on the highest and backside, apply end to them and the remainder of the cupboard. Be sure you tape off the components first to stop end from getting on any glue floor. When the end is dry, glue the highest and backside in place on the case, leaving a 3/4-in. overhang on the entrance and a 2-in. overhang on the edges. You need to use C-clamps or cam clamps within the entrance, bar clamps within the again, and cauls with bar clamps on the edges if wanted.
Glass set up
After making use of end, Becksvoort installs outdated or restoration glass within the doorways. It has a refined wave to it and is in step with the unique. The stops get tacked into the body.

Preload the stops. Set the glass within the rabbets. Earlier than you place the stops on the glass, drill pilot holes and set brads. Then place the stops on high of the glass towards the body.
 |
 |
Two methods to set a brad. Lay a thick piece of paper on the glass to guard it when you faucet the brad in place with a hammer. Alternatively, you need to use an adjustable wrench to slowly squeeze the brad dwelling.

Lastly, reinstall the doorways and add the magnets within the doorways and two small screws within the case to catch the magnets.
—Christian Becksvoort is a furnishings maker in New Gloucester, Maine.
To view the complete article, please click on the View PDF button beneath.


Tremendous Woodworking Advisable Merchandise
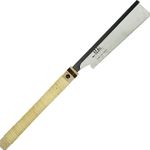
Suizan Japanese Pull Noticed
A flexible noticed that can be utilized for something from kumiko to dovetails. Mike Pekovich recommends them as a woodworker’s first handsaw.

Blum Drawer Entrance Adjuster Marking Template
This template acts as a “dowel middle” for punching a gap to mark the place to drill fro clearance holes.
Join eletters as we speak and get the newest strategies and how-to from Tremendous Woodworking, plus particular affords.
Obtain FREE PDF
once you enter your e-mail tackle beneath.

")
